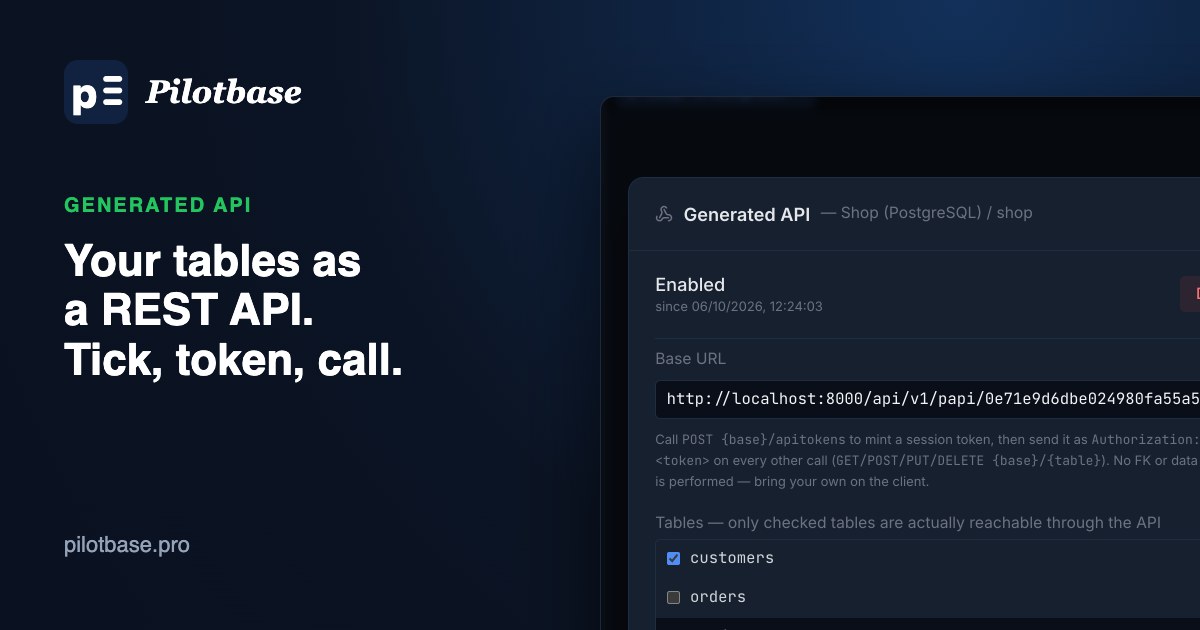
A REST API for your tables, without writing a backend
You have a database and a small app (a mobile app, a form, a script on another server) that needs to read and write a few tables. Usually that means writing and hosting a backend just to expose them. Pilotbase can do it for you: right-click a database, choose Enable API, tick the tables your app may use, and it serves list, read, create, update and delete routes for them, protected by a token.
We ran the whole flow against a test PostgreSQL database with three tables (customers, products, orders). Every screenshot and response below comes from that run.
Prefer to watch first? Here is the 33-second walkthrough video (vertical, no sound).
Where it works
The generated API is served by the Pilotbase backend itself, so it needs to run where your app can reach it: the Docker version on a server. It supports PostgreSQL, MySQL, MariaDB, SQL Server and MongoDB.
It is not available in the desktop app. The desktop backend only listens on 127.0.0.1, on a port that changes every launch, and it rejects any request without a per-launch token. In our test, an outside call to the desktop backend got 401 missing local token, so a phone or another server could never use it. The desktop app now hides Enable API, and the backend refuses to switch it on there. SQLite and DuckDB files are not supported yet either, because their database is a file path rather than a name.
Step 1: Enable the API on a database
In the connection tree, right-click the database (not the connection) and choose Enable API.
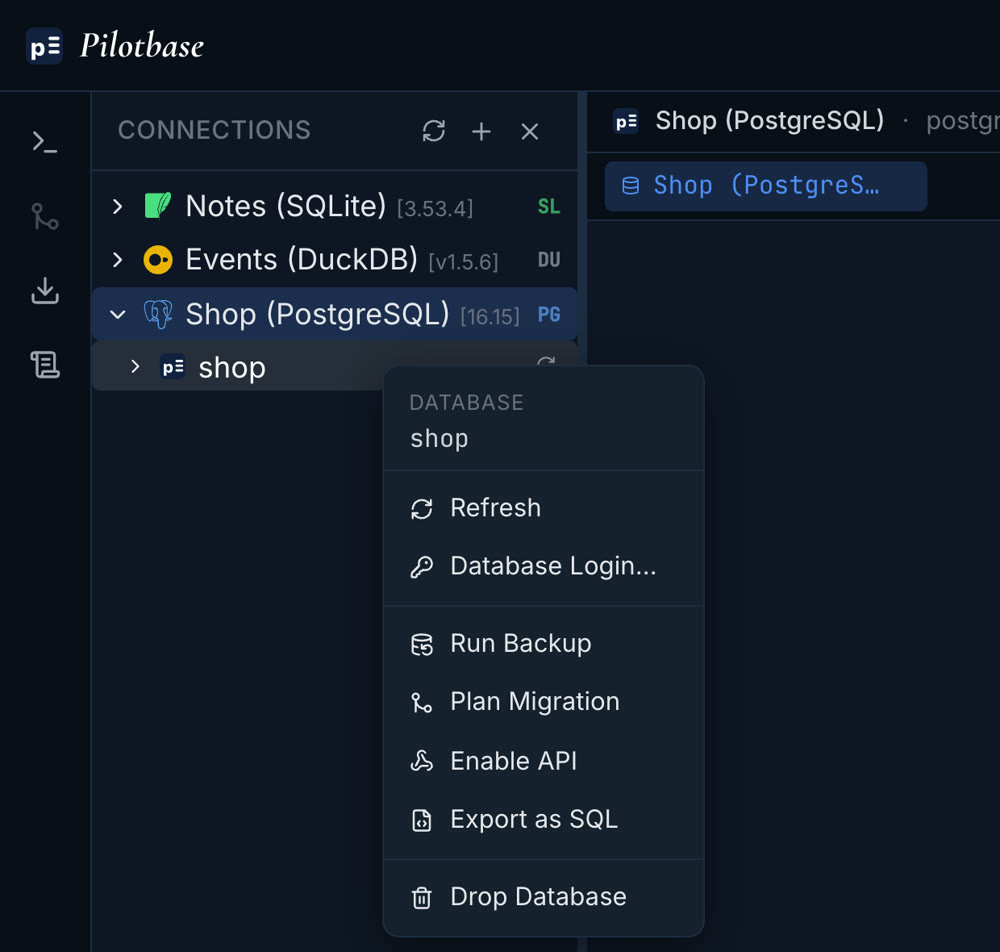
The dialog says what will happen. Click Enable.
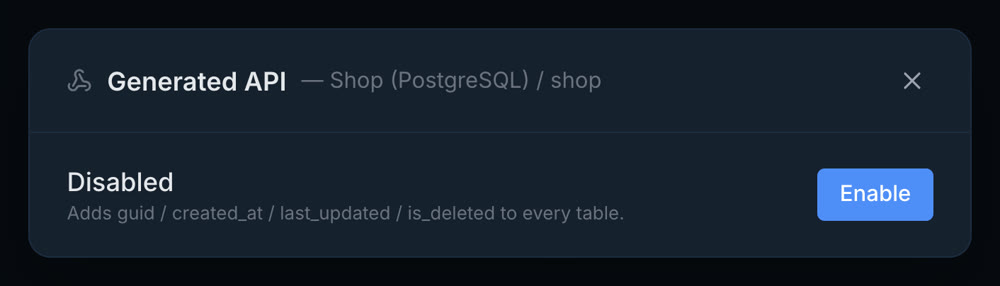
Enabling does two things to that database:
1. It adds four system columns to every table: guid (the row's ID in the API), created_at, last_updated and is_deleted. Rows that already exist get a guid and timestamps straight away, so your current data is reachable through the API too.
2. It creates an apitokens table that records each token, when it expires and whether it was revoked.
Because it changes your tables, enable it on a database you control and take a backup first (Run Backup is in the same menu).
Step 2: Choose which tables are reachable
Enabling the database doesn't expose anything yet. The dialog shows the base URL and a list of tables, and only the ones you tick can be called. We ticked customers and products and left orders off.
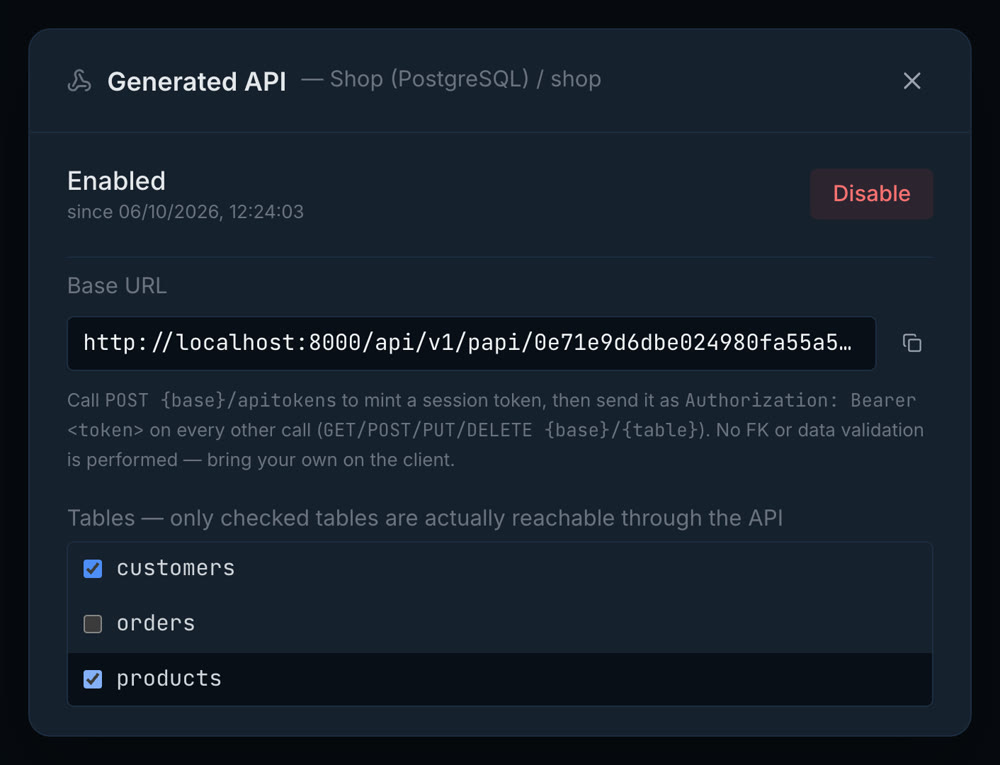
The base URL has the form https://<your-pilotbase>/api/v1/papi/<connection-id>/<database>. Copy it with the button next to it.
Step 3: Get a token
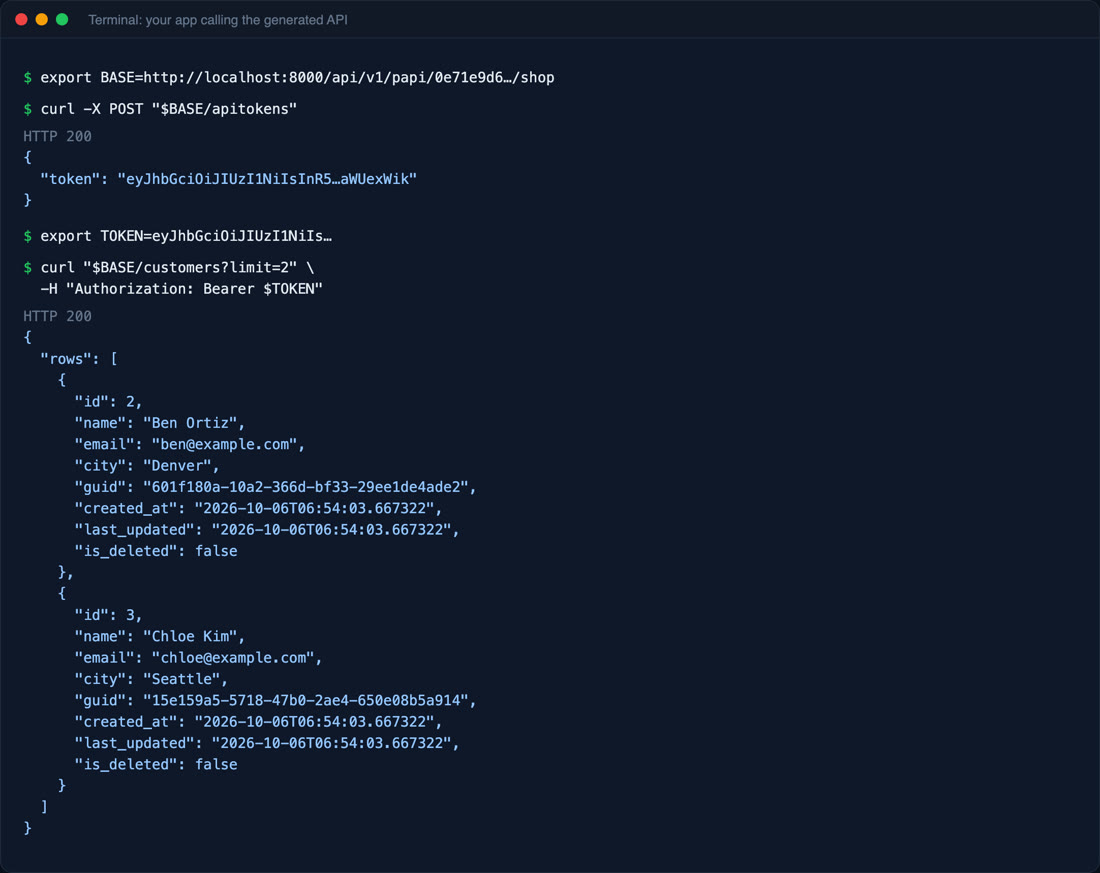
Your app asks for a token with one POST to /apitokens, then sends it as a Bearer token on every other call. Tokens last 30 days and are stored in the apitokens table, so you can revoke one by setting its revoked column.
Step 4: Read, create, update and delete rows
Each ticked table gets five routes:
Listing the first two customers. The rows that were there before we enabled the API already have a guid:
Creating a customer returns the new row with its guid. Use that guid to update or read it:
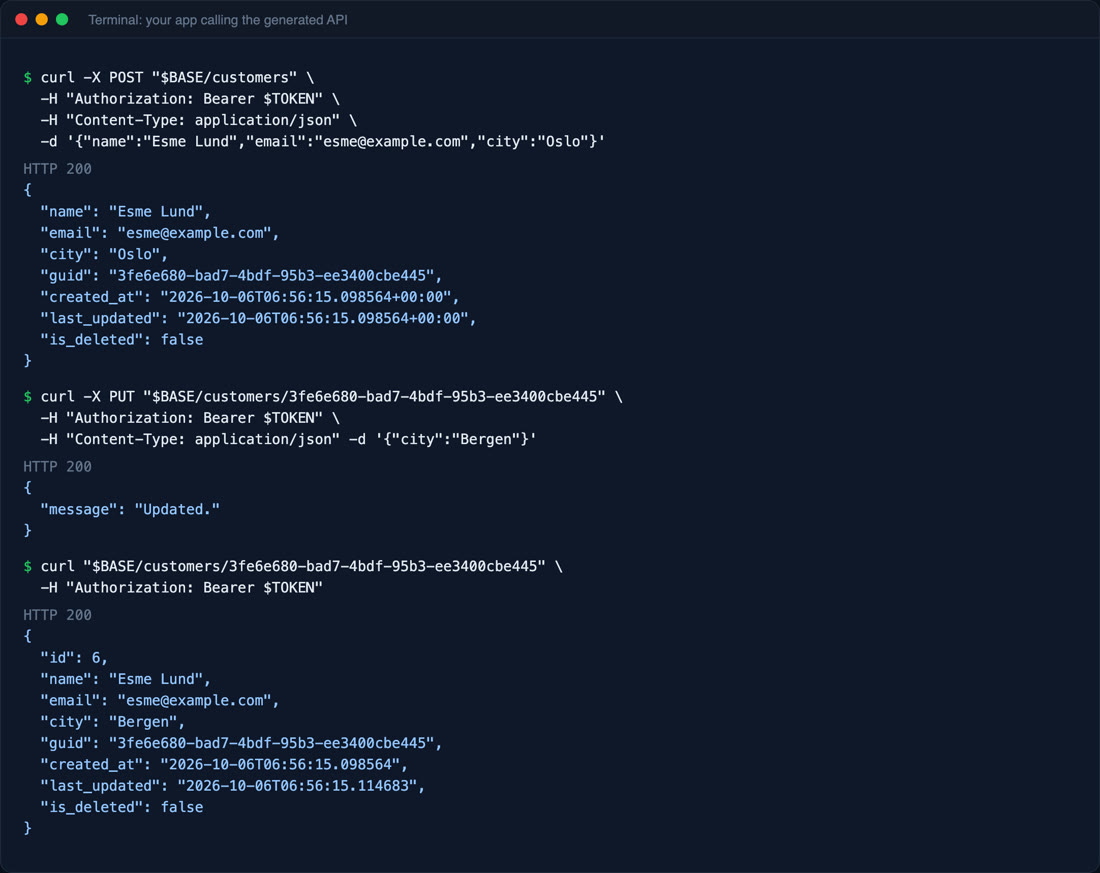
last_updated moves on every change.Deletes are soft
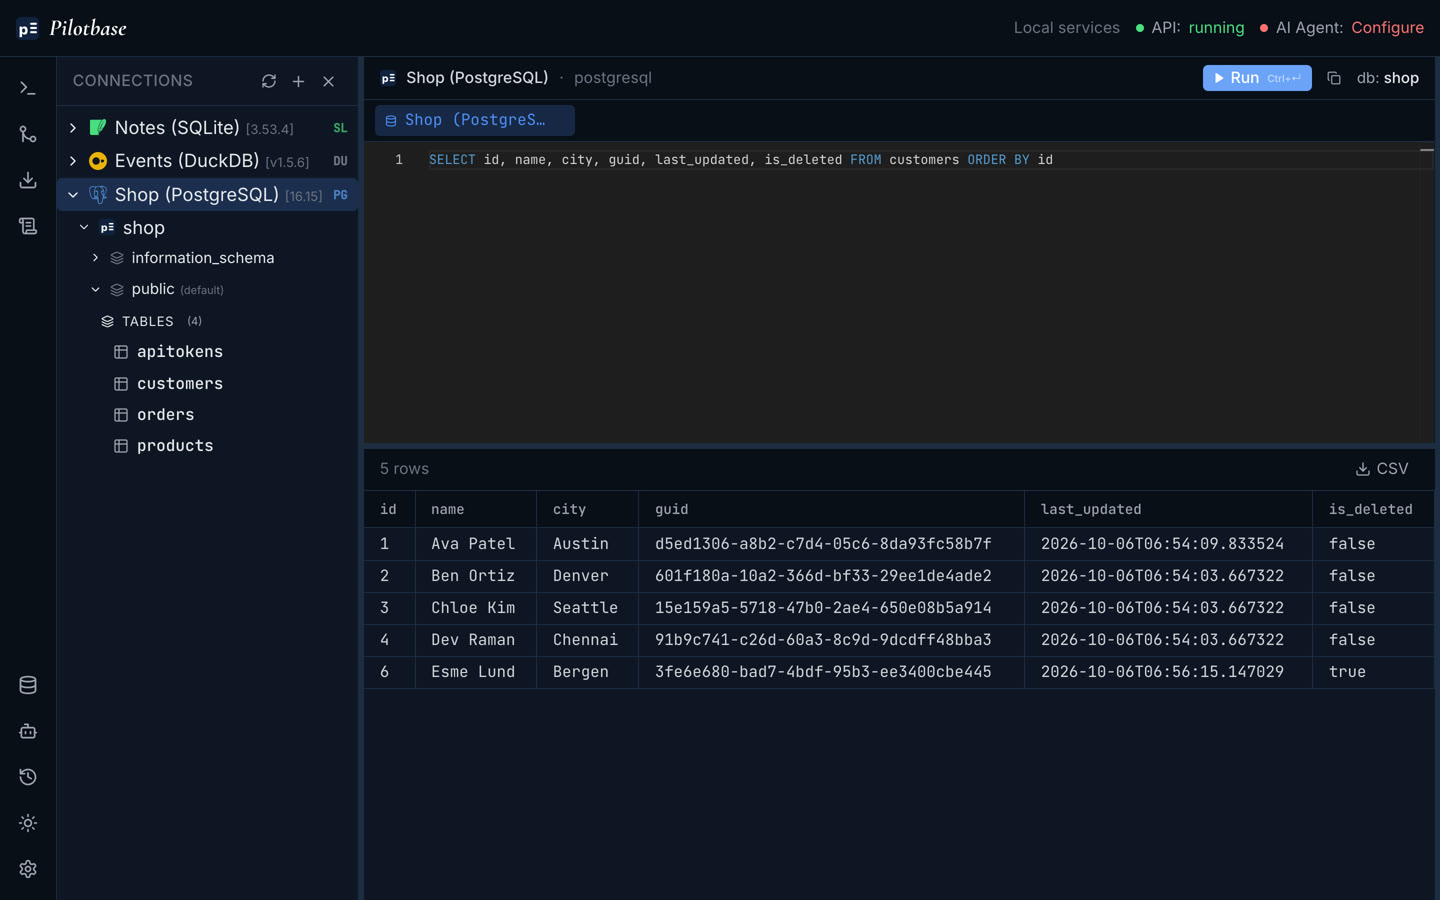
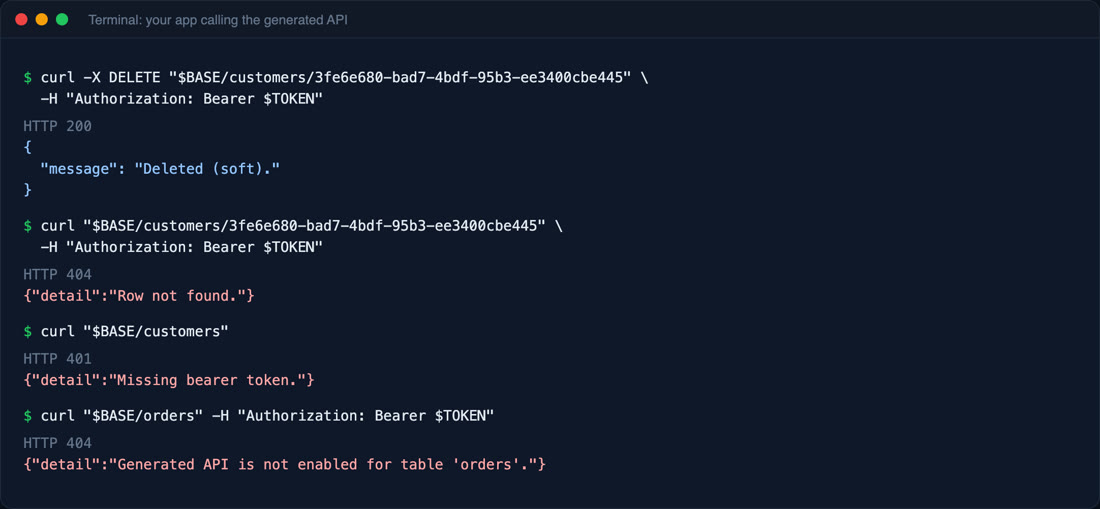
DELETE never removes the row. It sets is_deleted to true, and from then on the API treats the row as gone: it drops out of lists, and reading, updating or deleting it again returns 404. The data is still in your table if you need it back.
What happens without a token, or on a table you didn't tick
Know the limits before you ship it
The generated API is a thin, fast way to get data in and out. It is not a full backend, so plan for these:
- No validation. It writes what you send. Foreign keys and data checks are not applied by the API, so validate on the client or in the database (constraints, triggers).
- Anyone who can reach the URL can get a token. Token requests are rate-limited, but there are no user accounts or per-row permissions. Put it behind your own network rules or a gateway if the data is sensitive.
- Simple listing. Lists support limit and offset only, ordered by created_at. There is no filtering or sorting by other columns yet.
- Rows written outside the API get a guid when you next enable the database or a table. Until then they are listed but can't be read or changed by guid.
To switch it off, open the same dialog and click Disable. The extra columns and the apitokens table stay, so you can turn it back on later without losing anything.
Try it
Run Pilotbase with Docker on a server your app can reach, connect your database, and enable the API on a copy first. The Docker quick start takes a few minutes.
Pilotbase is free and open source (MIT). Run it with Docker and give your tables a REST API.
Get Pilotbase
Comments (0)
Loading comments…